Showing posts with label DIY. Show all posts

Sunday, February 4, 2018

How to replace battery on tile

I am pretty annoyed that the battery on my Tile died but that I could not replace it per the manufacture. This is how I replaced the battery on my tile device. After this process the device still connects to the phone but does not ring. I am not just using it for my car so that I know where I parked.

The battery is a CR2025 

If anyone has suggestions for alternative to this product that is easy to replace and maintain I would be interested to hear about it.

Opening tile to replace battery
I was able to open the casing with thumbnails on either side
replace battery on tile
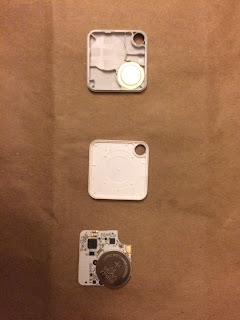
The tile opens into three pieces and contains a CR2025 battery
The battery is glued down so I needed to work it out with a box cutter. 
The battery sicks to the blade


I closed it with super glue.


Replace with CR2025

Monday, October 31, 2016

Kuchi Kopi Nightlight DIY Cast

kuchi kopi nightlight for sale
Until Kuchi Kopi nightlights are available for sale you might just have to cast your own in bees wax. though I guess you can get one that does not light up from Kidrobot.


Original positive in wax after being cut out of the mold. Sculpted by hand and then used to build mold. This time I used a 2 part food safe silicone mold. (Equinox 40 from smooth-cast)


 Heating bees wax mixed with @insert dye name@


Kuchi Kopi nightlight diy


Pouring in silicon mold


The bottom is carved out by hand and LED tealight was attached to the bottom after popping off the top of the tea light.


DIY kuchi Kopi nightlight
.
Kuchi Kopi light up night light with louise kidrobot figure
Stoked about the new bobs burgers kidrobot figures

Thursday, August 29, 2013

DIY COFFEE: Homegrown homeroasted... Single bean style.

Working to prepare for the apocalypse... which ever is currently in vogue. I think meteors currently. To that effect here is how I grew, roasted and brewed my own coffee. All be it on a small scale. Do you like small scale brewing? Check out my growing and brewing my own beer.

Coffee flowers on my Arabica plant. These are the first ones and the plant is now 7 years old.
The first coffee bean.... so pretty. Once it was somewhat soft to the touch I put it in a mesh bag (the kind fruit comes in) and left it hang in the LA sun for a few hot days.
This is what it looks like dried.
 I then peel the bean with my fingers.
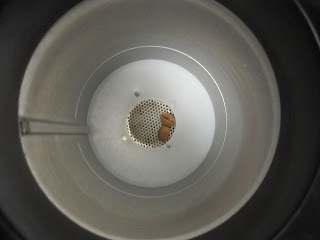
The coffee beans then go into the Air Popper until they are a nice light roast.
 Roasted!
 Grinding. Would be lost if I put it in the regular grinder.
Don't forget to pre-heat the morter and pessel. Yum!... sort of. Tasted a little bit like light coffee peanut butter.

Saturday, April 21, 2012

DIY Orangina recipe for Sodastream or soda water

orangina diy soadastream
Orangina is simply made of a mix of concentrated citrus juicee, high fructose corn syrup(HFCS) and soda water. I have not been using HFCS in any of my homemade sodas, Though I may eventually. In any case this recipe uses white sugar.

 When I was a kid i would try to make this by simply adding orange juice to soda water but this does not get you enough orange/sugar per volume as all the water in the orange juice is not carbonated. The trick to this recipe is you are taking the water out of the orange juice and making a concentrated syrup to add to soda water... Lets go.

 Here is what you need:
-white sugar
-a variety of citrus fruits, in this case two types of oranges, 1/2 grape fruit and a lemon
-a way to juice oranges...you know like a juicer please don't buy a fancy one. You don't even really need an electric one unless you are gonna do a lot of oranges.
-soda water or Sodastream, or direct SodaStream

1) Juice them fruits. Leave in some pulp.
 2) Pour the juice along with 3/4c white sugar into a nonstick pan and heat on low. Watch out it will foam up. you will need to keep an eye on it. Over time it will thicken up.
3) Heat till its thick. Once it is nice and thick. about the thickness of ____ . Take it off the stove and transfer to the freezer. It should not freeze! if it does you did not get enough water out and need to heat it again.
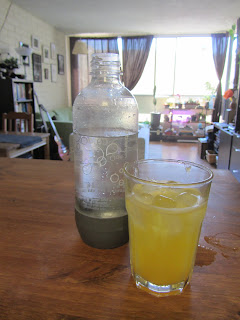
4) now add 2 TBSP to the bottom of a small glass and pour soda water on top.
5) drink up.

FAQ: 
When I mix soda water with my syrup it bubbles over WTF?
-Avoid this by making sure both the water and syrup are cold and always add the syrup first and soda second. 

Sunday, December 18, 2011

How to hang a picture on a brick or concrete wall

This is a DIY guide to hanging photos and pictures on a brick or concrete wall the cheap and easy way. 

Lightweight (5lbs or less) such as photos, records are easily hung with stick on hookssticker hook for hanging on brick wall

Your lightest items can be hung without screws, nails or any tools at all.
You will need: stick on hookssticker hook for hanging on brick wall
How to : Simply clean and dry the surface well before applying the adhesive sticker.
Removal: These can be pulled off. They may require some cleaning to get of residual bits of adhesive.


Medium sized items (~30lbs or less) such as pictures, paintings can easily and quickly be hung with concrete and hardwall plastic hooks. 
This is by far the easiest and best way to hang picture or most anything on a brick wall.
You will need: a hammer, concrete and hardwall plastic hooks. 
How to: Carefully measure where you want to place these as they can be only placed once. Hammer the four pins part way in then check positioning again. If you are satisfied with the placement hammer them the rest of the way in. 
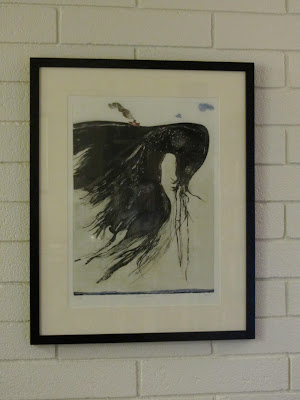
Demonstrated holding up a larger framed piece: Liza Jones- Optimist 


To hang heavy items such as mirrors, large framed paintings, photos or posters masonry anchorare needed.
You will need: powerdrill at the minimum but preferably a hammerdrill is needed. You will also need a screwdriver, and a masonry bit (the size is determined by the size of masonry anchor used). It is easiest to get a set of masonry anchors that come with screws and the drill bit.

Drill the appropriate size hole with a hammer drill


Hammer in the plastic anchor.

Screw in the screw most of the way and hang your piece.


I also used this for my nice letterpress box as a small item display case.
letterpress box


For very heavy objects such as construction projects require a lag bolt and shield
Similar to my recommendation for heavy items this will require a hammerdrill, socket wrench as well as the forfeiture of your damage deposit. The process is the same as above but with a 1/2" hole. 


Friday, December 2, 2011

Christmas cactus (Schlumbergera) DIY grafting experiment

This was a quick experiment to see if I could graft a chirstmas cactus (Schlumbergera) to an Epiphyllum. No idea if this will work or if these are compatible plants. Of note I am doing this in December while I have read it is better done in spring.

I did this with a very sharp knife and a piece of scotch tape. I found it easier to cut the scion (the top part of the final product) first then trace it to get the exact matching shape on the stock (the bottom part of the final product). I them matched them up as well as i could and taped them in place.